Home > products > Wire Harness Tester >
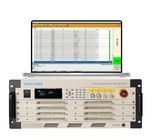
Comprehensive Automatic Cable Harness Tester For Rapid Inspection Of Wiring Harnesses

Comprehensive Automatic Cable Harness Tester For Rapid Inspection Of Wiring Harnesses

Automatic Cable Harness Tester

Comprehensive Automatic Cable Harness Tester

Rapid Inspection Wire Harness Tester

Place of Origin:

China

Brand Name:

SAIMR

Certification:

CE

Model Number:

SAIMR5000

Contact Us

Request A Quote
Product Details
Test Project:
Maximum Test Points, AC High Voltage, DC High Voltage, High Voltage Output Accuracy, High Voltage Measurement Accuracy, High Voltage Measurement Time, Short Circuit/Instantaneous Short Circuit/Fast Instantaneous Circuit Breaking, 2-Wire On Resistance, 4-Wi
DC:
30v-1500v
AC:
30V-1000V
Test Mode:
Four/two-wire Mixing Test
Insulation Testing:
1MΩ-10GΩ(30v-1500v)
DC Resistance:
0.1Ω-1MΩ
External 4-wire DC Resistance Test:
10μΩ-100Ω
AC Leakage Current Test:
1μA-10mA
DC Leakage Current Test:
0.1μA-5mA
LCR:
50Hz-10kHz
ESD:
0-10V
Payment & Shipping Terms
Minimum Order Quantity
1 SET
Price
To be negotiated
Packaging Details
Packing in wooden crates
Delivery Time
30 days
Payment Terms
To be negotiated, T/T
Product Description
Author: Suzhou Semyer Electronic Technology Co., Ltd


This manual describes the usage and precautions of the SAIMR5000 series comprehensive tester and is suitable for engineers and technicians who need to perform a quick inspection of the wiring harness. The instrument can accurately detect problems such as open circuit, short circuit and misalignment in the wiring harness, and has the functions of test project management, network segment management, system function module, test function, data storage and query, barcode printing and user management.


1. Overview of the instrument


  • Introduction: SAIMR5000 series comprehensive tester is an instrument used for rapid inspection of wiring harnesses, which can accurately detect open circuits, short circuits and misalignments in the test wiring harness, and help users quickly detect problems in the wiring harness.
  • Performance characteristics: distributed structure, modular design, multi-function test, high-precision on-resistance, self-learning function.
  • Name of each part: Each tester consists of a test card and a switch array card, the number of switch array cards can be selected (up to 8), and the test card and the switch array card are inserted on the mother card. A test chamber can have 1024 test points, which can be used together or individually.
  • Dimensions: 5000 Desk Box Scales (512 points): 482.6 mm× 406.5 mm× 266 mm; 5000 S Desk Box Scale (512 points and below): 482.6 mm× 406.5 mm× 183 mm.


2. Preparation before the test


  • Test Process Preview: Keep the instrument in the power-off state, follow the steps below to prepare for the test:
    • Plug in the power cord;
    • Turn off the power of the instrument and connect it to the computer through the network cable;
    • Connect the test cable;
    • Press the power on the instrument panel to the "On" state;
    • Open the test software settings on your computer and test it.
    • When the test is over, turn off the power.
  • Pre-test inspection: Before use, confirm that there are no faults caused by storage and transportation, and use after checking and confirming the operation. If you confirm that there is a fault, please contact our sales office.
  • Preparation for connection prior to testing: For safety, use the test lead that came with the instrument and ensure that the test lead is properly connected.


3. Verify the measurement function


  • Test mode setting: Press the [RECALL] button on the test page to switch to the mode page, use the up and down keys to select the test mode, and press the [ENTER] key to confirm, and return to the test page.
  • DC RES DC Resistance Test: DC Resistance Test page, use the up and down keys to set the range: 0.01, 0.1, 1, 10, 100, 1k, 10k, 100k.
  • LCR test: On the LCR test page, use the left and right keys to select items, and use the up and down keys to select range, frequency, and test items.
  • INSUL RES Insulation Resistance Test: Insulation Resistance Test page, use the left and right keys to select the item, use the up and down keys to select the range, and the number key to enter the voltage value.
  • AC VOLT Hipot Test: On the AC Hipot Test page, use the left and right keys to select items, and use the up and down keys to select the frequency, range, and number keys to enter the voltage value.
  • DC VOLT DC Hipot Test: On the DC Hipot Test page, use the left and right keys to select the item, use the up and down keys to select the range, and the number key to enter the voltage value.
  • OS RES On-Resistance Test: Precise OS On-Resistance Test page.
  • ESD Diode Hipot Test: Diode Hipot Test page, use the number keys to enter the voltage value.
  • POINT Finding Function: Switch to the Finding Point page and use the Finding Pen to find the point.
  • VERSION: Open the system version to view the system version and other information.
  • IP Address: Open to view the communication address between the device and Windows.


Fourth, software settings


  • System function project introduction: Before using the software, users can get a general understanding of the functions of the software through the following function table.
  • Login to the system: After the program runs, a login page pops up.
  • Create a new project: Click [New Project] to pop up the Create a new project dialog box.
  • Load the project: Click [Load Project] to enter the loading project page, select the name of the project to be loaded, and click [Load] to load the existing project.
  • Project Management: Click [Project Management] to enter the project management page and display the current project information.
  • System settings: Click [System Settings] to open the system settings interface, and the system settings are divided into: test box, test channel setting, test parameter setting, file saving setting, barcode scanner setting, temperature channel setting, LCR port clearing, IO port testing, inter-process communication, plug-in management, etc.
  • System self-test: Click [System Self-test] to pop up the system self-test dialog box.
  • Test mode: Click [Test Mode] to open the page test mode.
  • Find Point: Click [Find Point] to pop up the Find Point dialog box.
  • Multimeter: Click Multimeter to pop up the multimeter test page.
  • Data query: Click [Data Query] to open the data query interface: select the time and date, enter the number and project name to query the relevant information of the test data; You can also choose to view only any test data in PASS or FALL, and select the test result item.
  • User management: Click [User Management] to enter the user management interface.
  • Change password: Click [Change Password] to pop up the change password page, enter the original password, new password, and confirmed password of the login account, and [OK] to change.


五,EXT I/O口(Handler)


  • EXT I/O Ports & Signals: The rear panel of the instrument has EXT I/O terminals that support external control, provide output of test signals, and accept input signals. Optocouplers are used for all input signals. Understanding the internal circuit structure and paying attention to safety precautions is conducive to better connection control system.
  • Port signal connection: input circuit connection, output circuit connection.


6. Parameters


  • Basic parameters: model, measurement method, maximum number of test points, AC high voltage, DC high voltage, high voltage output accuracy, high voltage measurement accuracy, high voltage measurement time, short circuit / instantaneous short circuit / fast instant circuit break, two-wire on-resistance, test range, four-wire conduction test current, AC high-voltage leakage current, DC high-voltage leakage current, DC high-voltage insulation, level signal, current signal, capacitance measurement range, resistance test range, inductance test range, frequency signal, range mode, Diode/Regulator Test Range, Test Signal, Unilateral Test, Short Break Endpoint Judgment, Programmable Continuous Test/Automatic Point Finding/Automatic Diagnosis, Test Scan Mode, Measurement Signal, Memory Memory, OS Voltage, Control Panel, Calibration/Metrology, Weight, Size (Unit: mm).
  • Accuracy: temperature, humidity, insulation accuracy, warm-up time, calibration time, test items, range, basic accuracy.


7. Operation


  • SAIMR5000 basic operation process of machine and software:
    • Connect the machine to the power supply, connect the machine to the computer for network cable communication, and plug in the test cable and test port;
    • Boot up, open the software (default user name: admin; Password: 123456), see if the machine in the lower left corner communicates successfully with the computer;
    • If the communication is successful, the project can be established; If it shows Waiting for Communication, it means that the device is not communicating with the computer, and you need to change the IP address in the software and on the computer;
    • Create a new project or load a project, and then enter the project management to learn the point and select the test project.
    • Enter the system setting interface to select the path for saving the test results;
    • Go to the test interface to start the test or use contact detection and external trigger detection.

Send your inquiry directly to us

Privacy Policy China Good Quality Wire Harness Tester Supplier. Copyright © 2024-2025 wireharnesstesters.com . All Rights Reserved.